If grass keeps failing in the same spot no matter what you do, the answer isn't to keep reseeding. It's to figure out why grass won't grow there and plant something that actually fits those conditions. That's what this guide is for. I'll help you diagnose the problem first, then give you specific plant picks and a realistic plan to get something green and established as fast as possible.
What to Plant Where Grass Won't Grow: Easy Guide
Marcus Volkmann
24 Mar 2026
Diagnose Why Grass Won't Grow in Your Spot
Before you spend money on plants or amendments, you need to know what you're actually dealing with. Most grass failures come down to one of six causes, and the fix is completely different depending on which one you have.
Too Much Shade
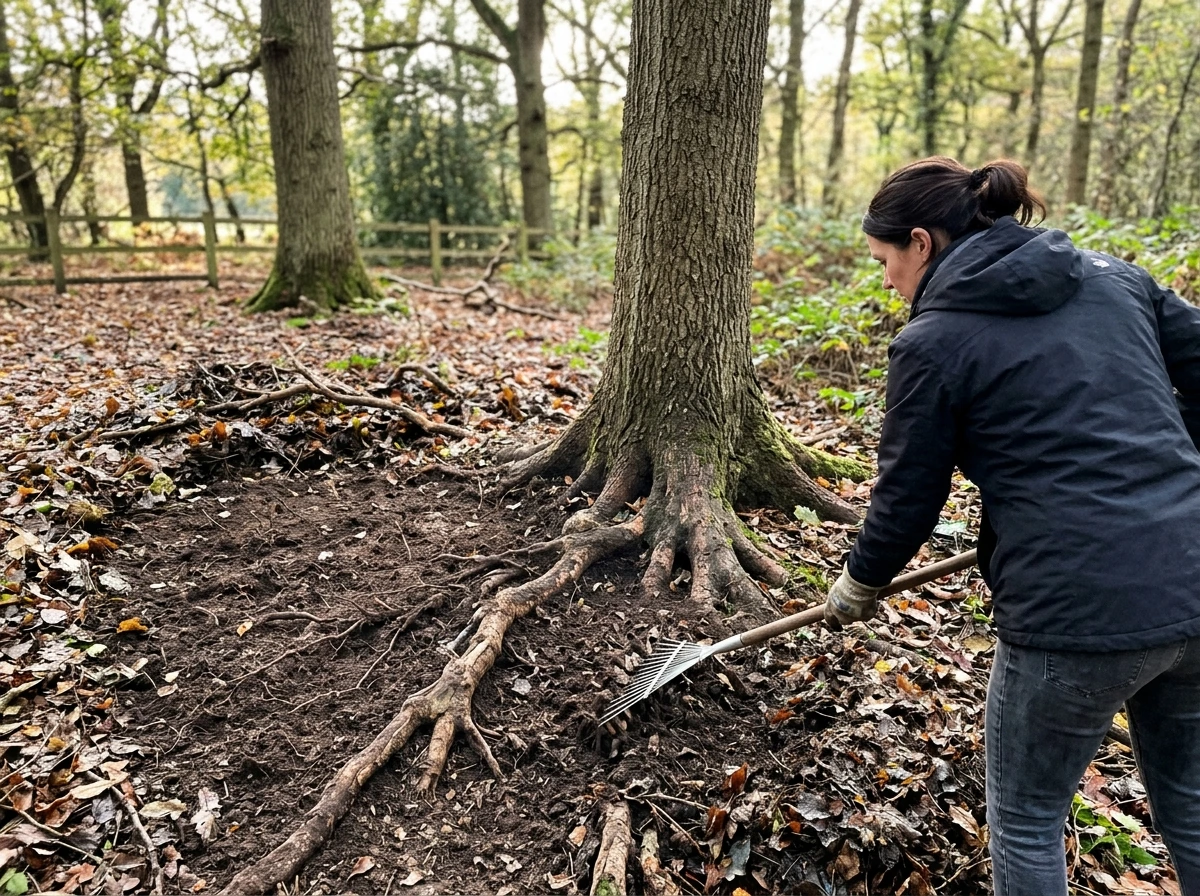
This is the most common reason I see grass give up. Even shade-tolerant turf varieties need at least 3 to 4 hours of direct sun per day. If you're under a dense canopy of mature trees, the grass is competing for light, water, and nutrients simultaneously, and it's going to lose all three. You can observe this by watching how many hours of direct sunlight hit the bare patch. If it's fewer than 3 hours, grass probably isn't a realistic option regardless of seed variety.
Soil Compaction
Compacted soil is a silent killer. According to Nebraska Extension, compaction reduces oxygen levels in the soil, slows water infiltration, and stunts root growth. If you've got a high-traffic path across the yard, a spot near a driveway, or an area where kids or pets run the same route every day, compaction is likely. Do a quick screwdriver test: push a standard screwdriver into the soil with hand pressure. If it won't go in more than 2 inches without force, the soil is compacted enough to stunt most plant roots.
Drainage Extremes (Too Wet or Too Dry)

Some spots stay soggy after rain for 24 hours or more. Others dry out so fast they crack. Grass doesn't thrive at either extreme. A low-lying area that collects runoff or sits near a downspout will drown turfgrass roots. A sloped, south-facing bank or a strip between a sidewalk and road will bake out. You need plants designed for those specific drainage profiles, not grass.
Poor Soil Quality
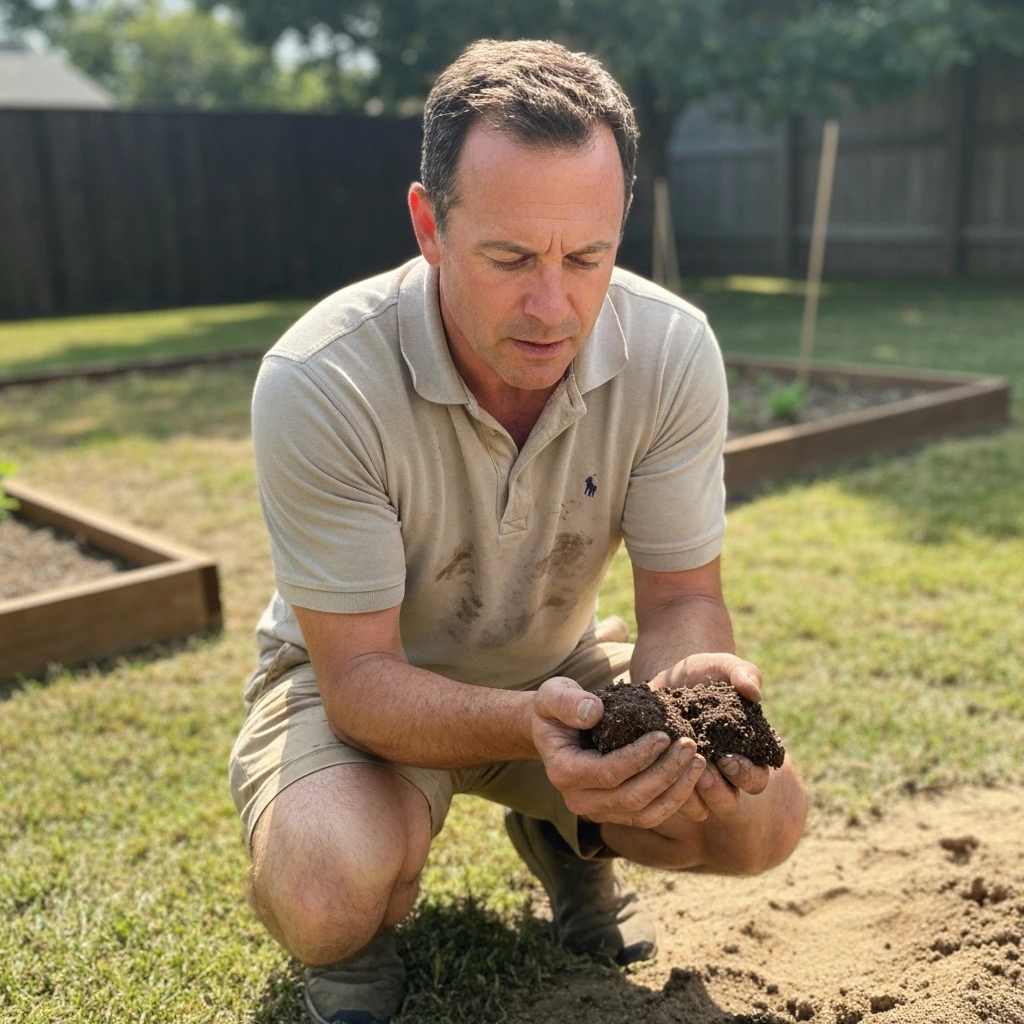
Fill soil under new construction, hardpan clay, pure sand, or highly acidic/alkaline soil can all make grass establishment nearly impossible. The best way to actually know what you're working with is a soil test. University of Minnesota Extension points out that a lab test tells you soil texture, pH, organic matter percentage, phosphorus, and potassium levels, giving you a real baseline to work from rather than guessing. Many state extension services offer these for under $20, and the results guide every amendment decision you make.
Foot Traffic
Heavy foot traffic beats down soil and shreds leaf tissue faster than most plants can recover. NC State Extension specifically notes that foot traffic is a major mechanism behind turf failure in clay soils because it accelerates compaction. If the bare patch is a path that people actually use, no ground cover plant is going to survive there without some kind of hardscape element (stepping stones, decomposed granite, pavers) included in the plan.
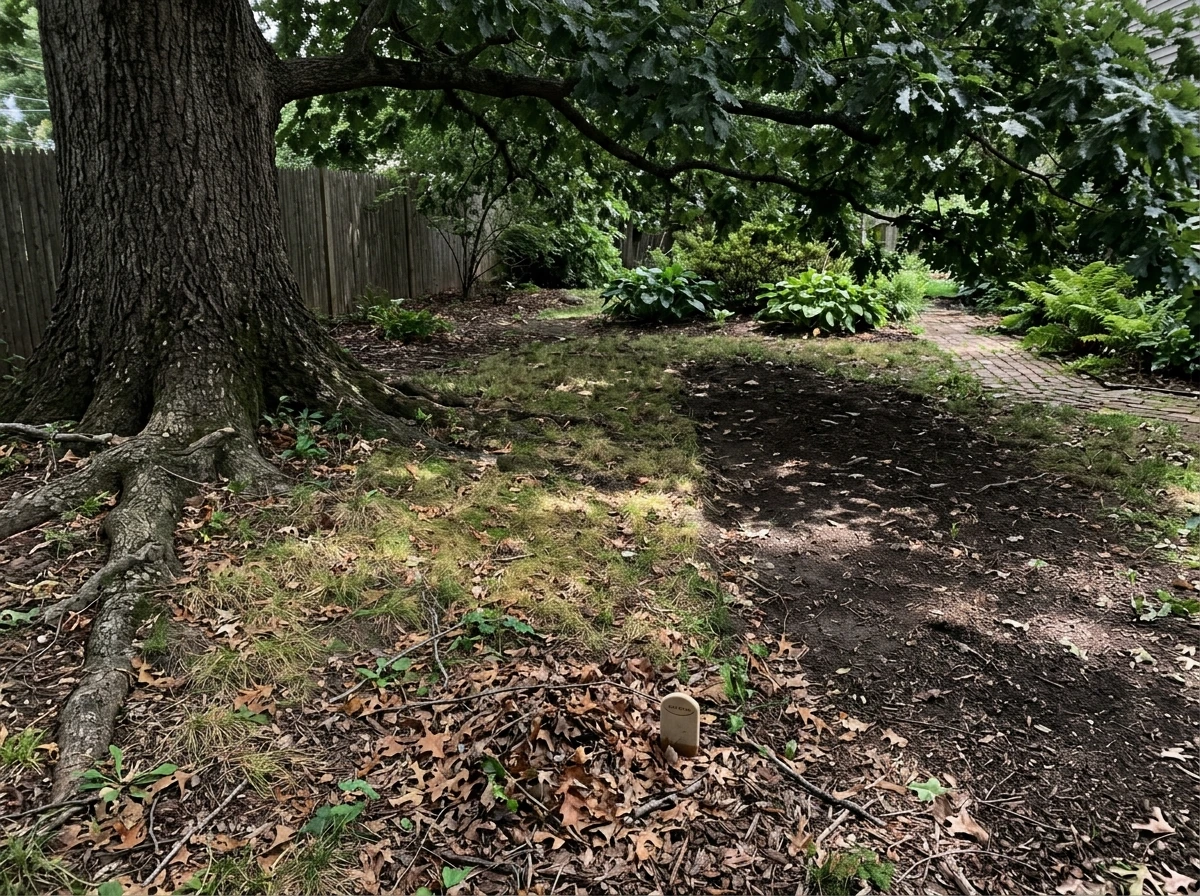
Tree Root Competition
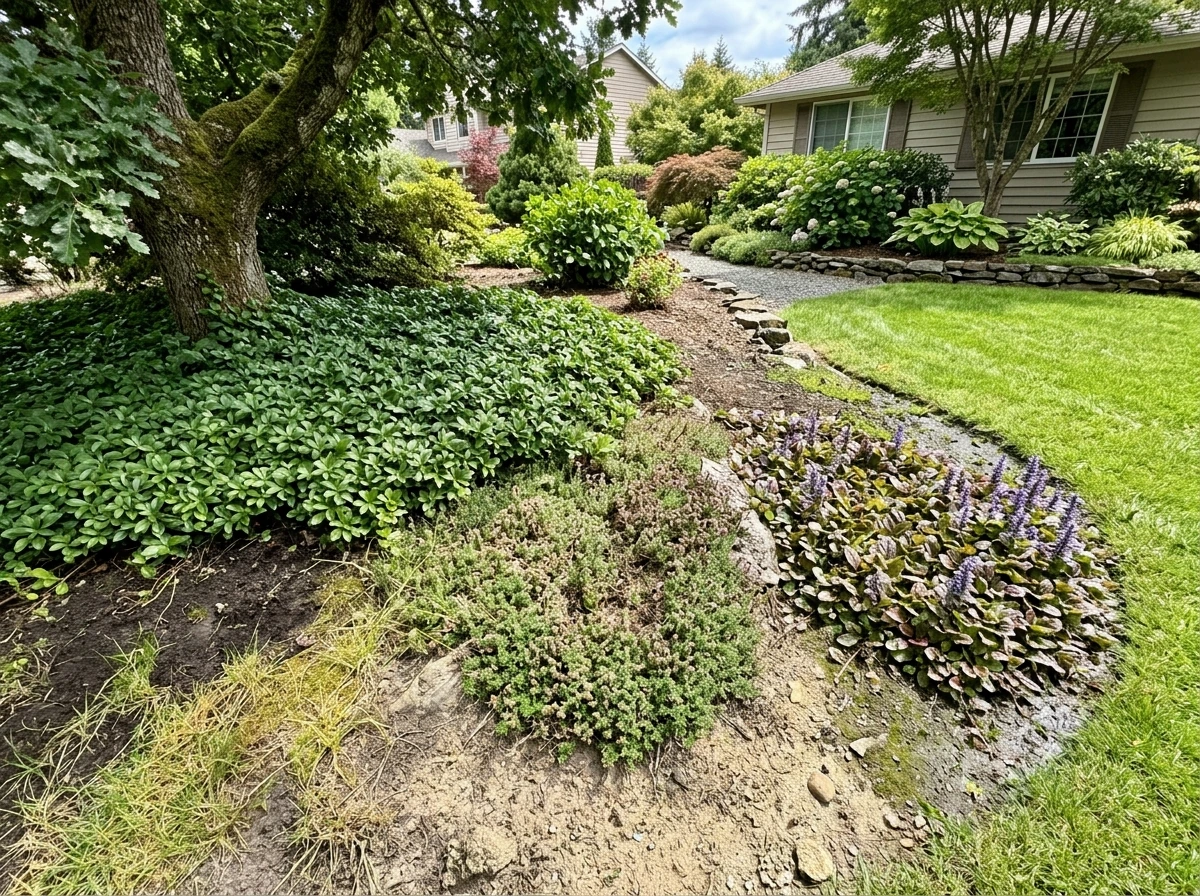
Established trees suck up moisture and nutrients from a wide area. The shallow feeder roots of mature maples, beeches, and similar trees physically crowd out grass roots and create a dry, root-packed environment that very few plants can penetrate. This is a distinct problem from shade alone, even though the two often occur together. You may be dealing with both under one tree.
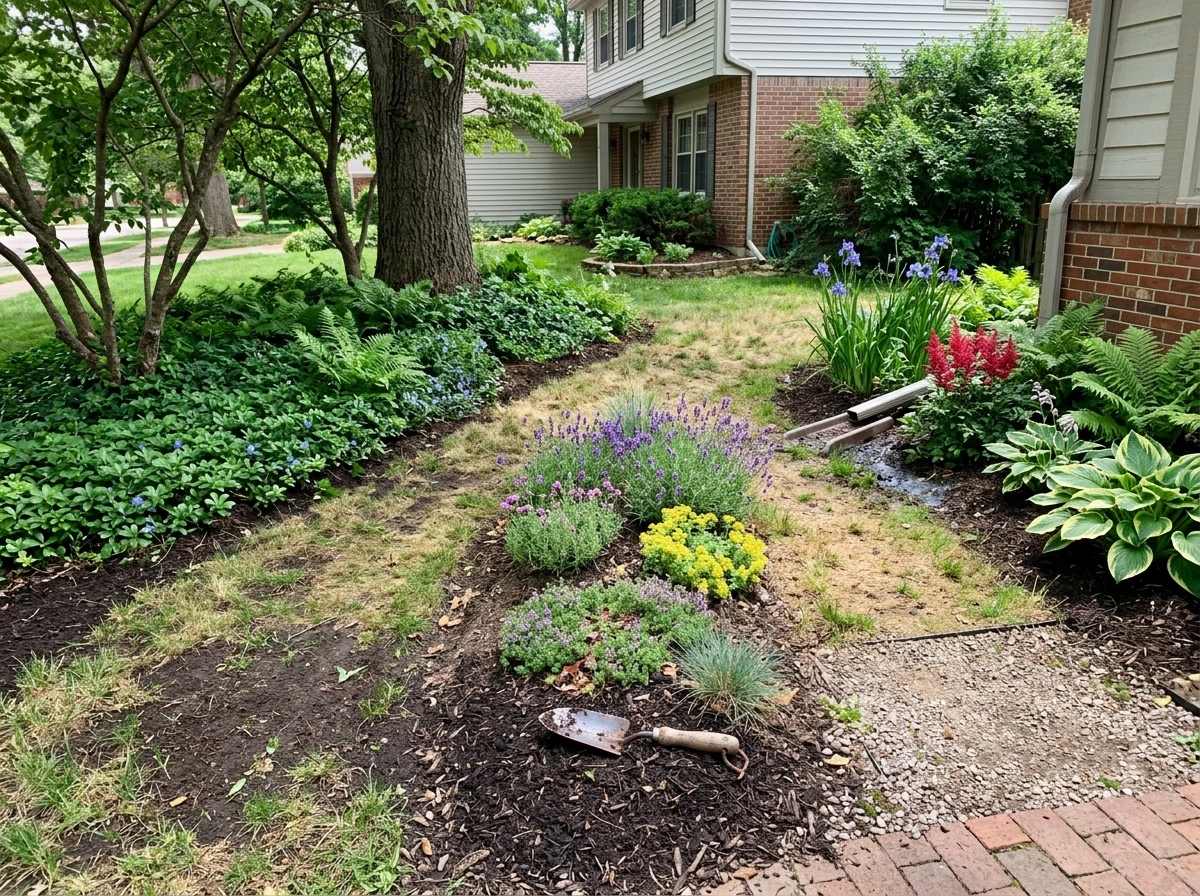
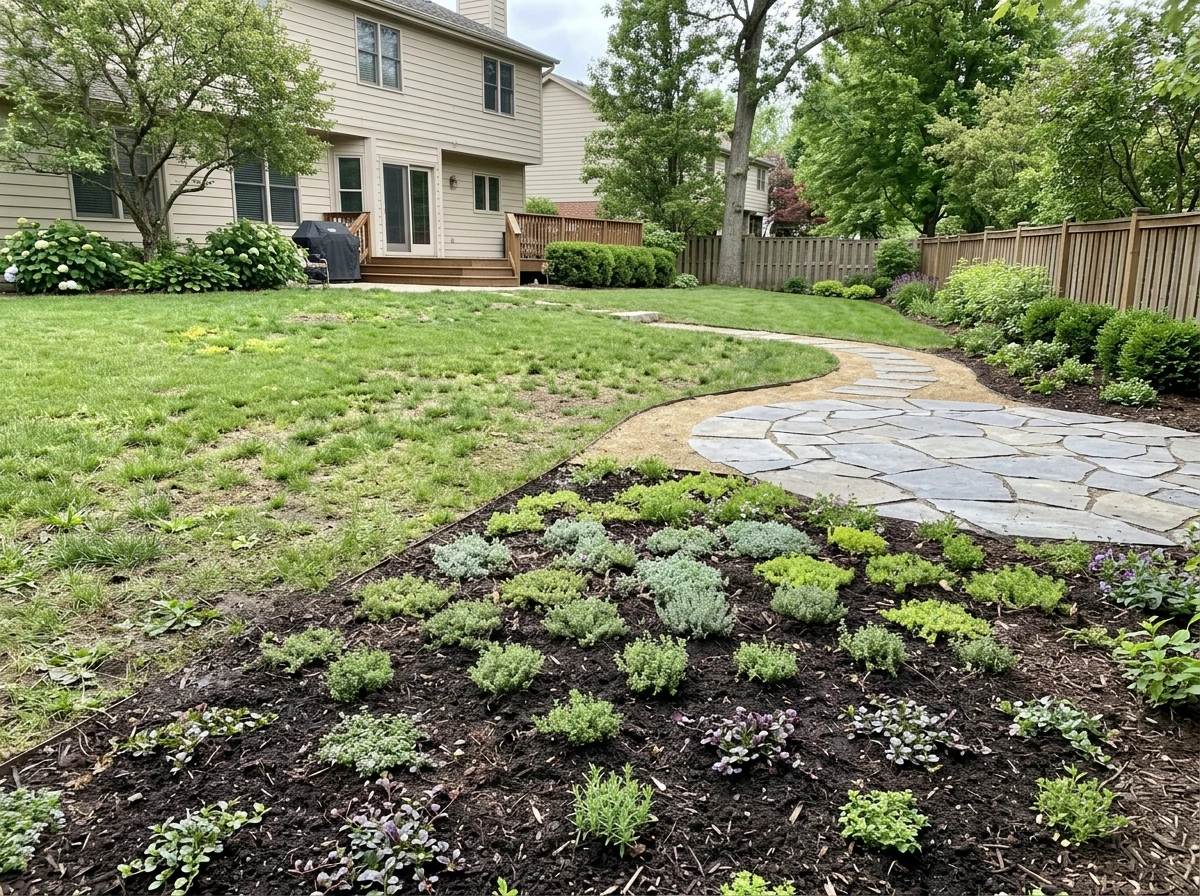
Grass-Free Ground Covers for Every Condition
Once you've identified your problem, you can match plants to conditions. Below are my go-to recommendations organized by the most common site types. All of these spread to fill space without mowing and can handle the conditions where grass can't.
Shade (Under Trees or North-Facing Areas)
- Pachysandra terminalis: Evergreen, spreads by underground stems, handles deep shade and dry soil under trees once established. Spacing: 6 to 12 inches apart for coverage in 2 to 3 seasons.
- Vinca minor (periwinkle): Aggressive spreader in shade or part shade, produces purple flowers in spring. Great under tree canopies. Spacing: 12 inches apart.
- Wild ginger (Asarum canadense): Native option for deep shade and moist soil. Slow to establish but extremely tough once rooted. Spacing: 6 to 8 inches apart.
- Liriope muscari (lilyturf): Tough, clumping grass-like plant that handles shade to part sun. Good for edges and borders. Spacing: 12 to 18 inches apart.
- Hostas: For dappled shade with decent moisture, hostas fill space fast and look intentional. Many varieties spread to 18 to 36 inches wide in a few seasons.
Full Sun and Dry Areas
- Creeping thyme (Thymus serpyllum): Handles full sun, drought, and even light foot traffic. Flowers attract pollinators. Spacing: 8 to 12 inches apart.
- Sedum (stonecrop varieties): Extremely drought-tolerant, spreads well in rocky or sandy soil, very low maintenance. Spacing: 10 to 12 inches apart.
- Creeping juniper (Juniperus horizontalis): Woody, evergreen, spreads 6 to 8 feet wide over time. Excellent for slopes and dry banks.
- Lantana: In USDA zones 8 to 11, lantana spreads vigorously in full sun and poor soil. Drought-tolerant once established.
- Buffalo grass or blue grama (native grass alternatives): If you want a grass-like look without the maintenance, these native grasses handle heat, drought, and neglect far better than turfgrass.
Consistently Wet or Poorly Drained Areas
- Marsh marigold (Caltha palustris): Loves wet soil, bright yellow flowers in spring, native to North America.
- Blue flag iris (Iris versicolor): Thrives in boggy or consistently moist soil, spreads slowly into a dense clump.
- Creeping Jenny (Lysimachia nummularia): Fast-spreading, handles wet to average soil, stays low and fills in quickly. Watch it in mild climates as it can spread aggressively.
- Sedges (Carex species): Native sedges look like ornamental grasses and handle wet to average conditions. Many handle shade too.
- Cardinal flower (Lobelia cardinalis): Moisture-loving perennial that self-seeds and fills wet areas over time.
Planting Options by Soil Type and Site Conditions
Soil type changes which plants establish easily and which ones struggle. Here's a quick reference for matching plant choices to your actual site conditions.
| Site Condition | Best Plant Options | Avoid |
|---|---|---|
| Sandy, fast-draining soil | Creeping thyme, sedum, creeping juniper, lantana, native prairie grasses | Hostas, marsh marigold, sedges |
| Heavy clay soil (slow drainage) | Liriope, hostas, sedges, blue flag iris, creeping Jenny | Sedum, creeping thyme in standing water |
| Compacted soil (high traffic path) | Creeping thyme (light traffic only), decomposed granite + stepping stones, creeping Jenny at edges | Any plant without hardscape protection |
| Deep shade under trees | Pachysandra, vinca minor, wild ginger, hostas, liriope | Creeping thyme, sedum, lantana, most sun-lovers |
| Dry shade (under dense trees) | Pachysandra, liriope, epimedium (barrenwort), dry-tolerant hostas | Moisture-loving sedges, cardinal flower |
| Slopes and banks | Creeping juniper, vinca minor, crown vetch (erosion control), ornamental grasses | Hostas, marsh marigold, any shallow-rooted annual |
| Wet low spots | Marsh marigold, blue flag iris, cardinal flower, creeping Jenny, sedges | Sedum, creeping thyme, pachysandra |
A note on compacted soil specifically: core aeration before planting makes a real difference. University of Maryland Extension explains that core aeration encourages root growth by increasing oxygen to roots and allows amendments to enter the soil. If you're converting a compacted area to a planted bed, aerate first, then amend, then plant. UMass Amherst also cautions against aerating when soil is too wet, so time it for when the soil is moist but not saturated.
Soil Prep and Site Setup to Help Alternatives Establish
The fastest way to fail with ground covers is to skip site prep. I've watched people drop pachysandra plugs straight into compacted, root-filled soil under a maple and wonder why it never fills in. Here's how to actually set the plants up to succeed.
Start With a Soil Test
Before you buy amendments, get a soil test. University of Minnesota Extension is clear that submitting a sample to a lab is the best way to know what your soil actually needs. You'll get pH, organic matter, phosphorus, and potassium readings with specific amendment recommendations. Skipping this step means guessing, and amendments cost money. Most state university extension labs process tests for $15 to $25.
Clear the Area First
Remove existing dead grass, weeds, and debris. For smaller areas, hand-pulling or a flat spade works fine. For larger areas, smothering with cardboard and 3 to 4 inches of wood chip mulch for 8 to 12 weeks (sheet mulching) kills off existing vegetation without herbicides and breaks down into organic matter over time. If you're in a rush, a non-selective herbicide like glyphosate applied to actively growing weeds and then waited 2 weeks before planting is the faster route.
Amend Based on What You Found
- Sandy soil: Work in 2 to 3 inches of compost to improve water retention and add nutrients. Repeat annually until the soil builds up organic matter.
- Clay soil: Add coarse horticultural sand AND compost together (never sand alone in clay, which creates concrete-like results). Gypite or calcitic lime may also help if your pH is off.
- Compacted areas: Core aerate before amending. Then apply compost and work it into the cores so it reaches root depth.
- Under trees: Go light on soil disturbance. Shallow-till only the top 2 to 3 inches to avoid severing surface tree roots. Use compost as a top-dressing instead of deep tilling.
- Low pH (acidic): Add lime at rates specified by your soil test. High pH (alkaline): Sulfur amendments help. Both take weeks to shift, so test before planting.
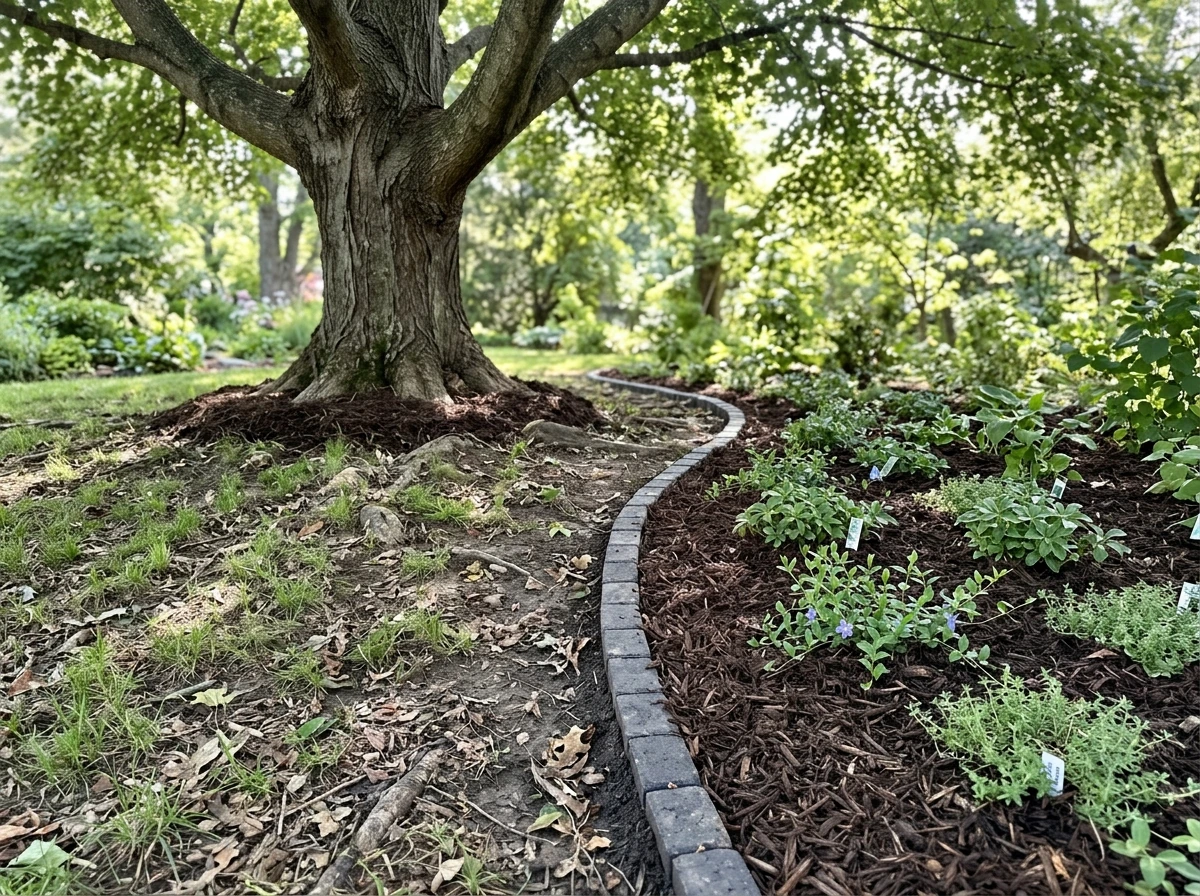
Install Edging and Lay Mulch
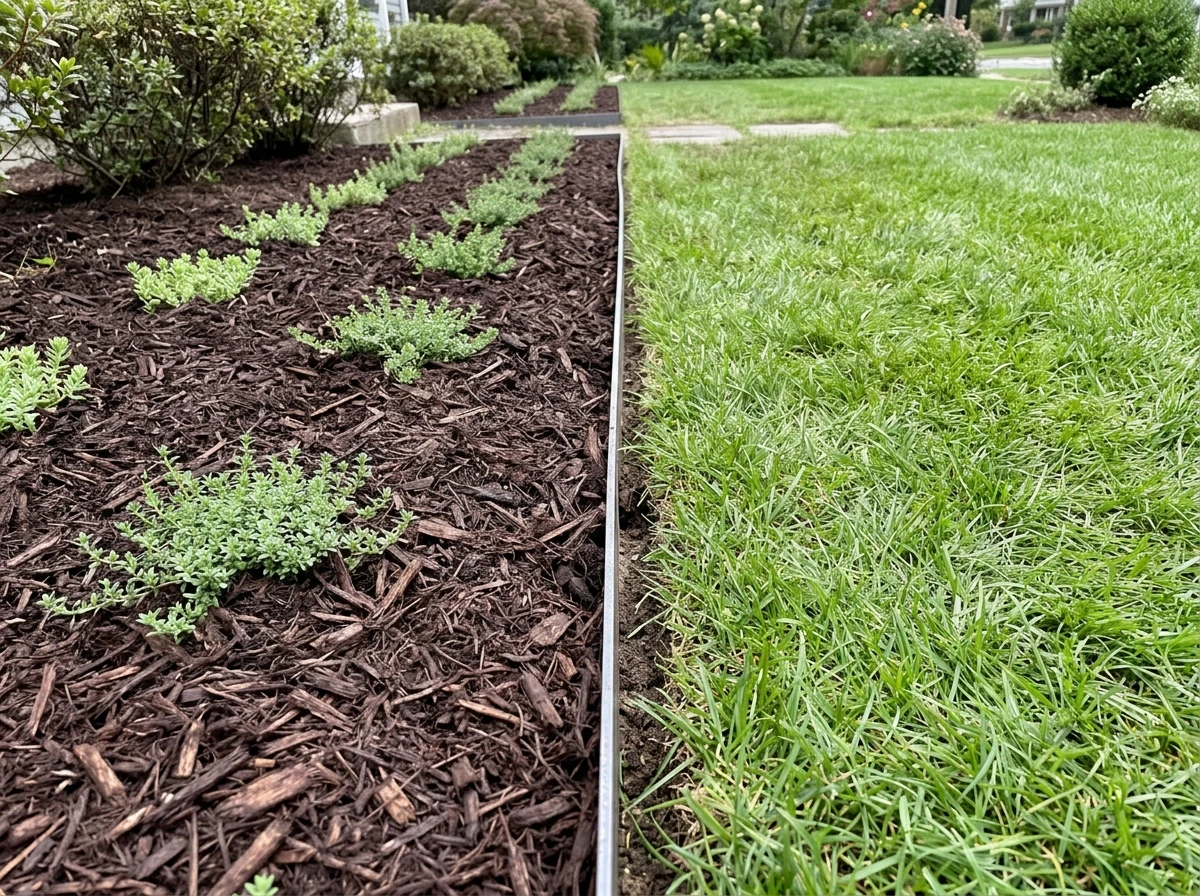
Edging keeps your new planting bed defined and prevents lawn grass from creeping back in. Steel or aluminum edging sunk 3 to 4 inches deep works best for permanent beds. After planting, apply 2 to 3 inches of shredded wood mulch around (not on top of) new plants. Mulch holds moisture, moderates soil temperature, and suppresses weeds while your ground cover fills in. Avoid piling mulch directly against plant stems.
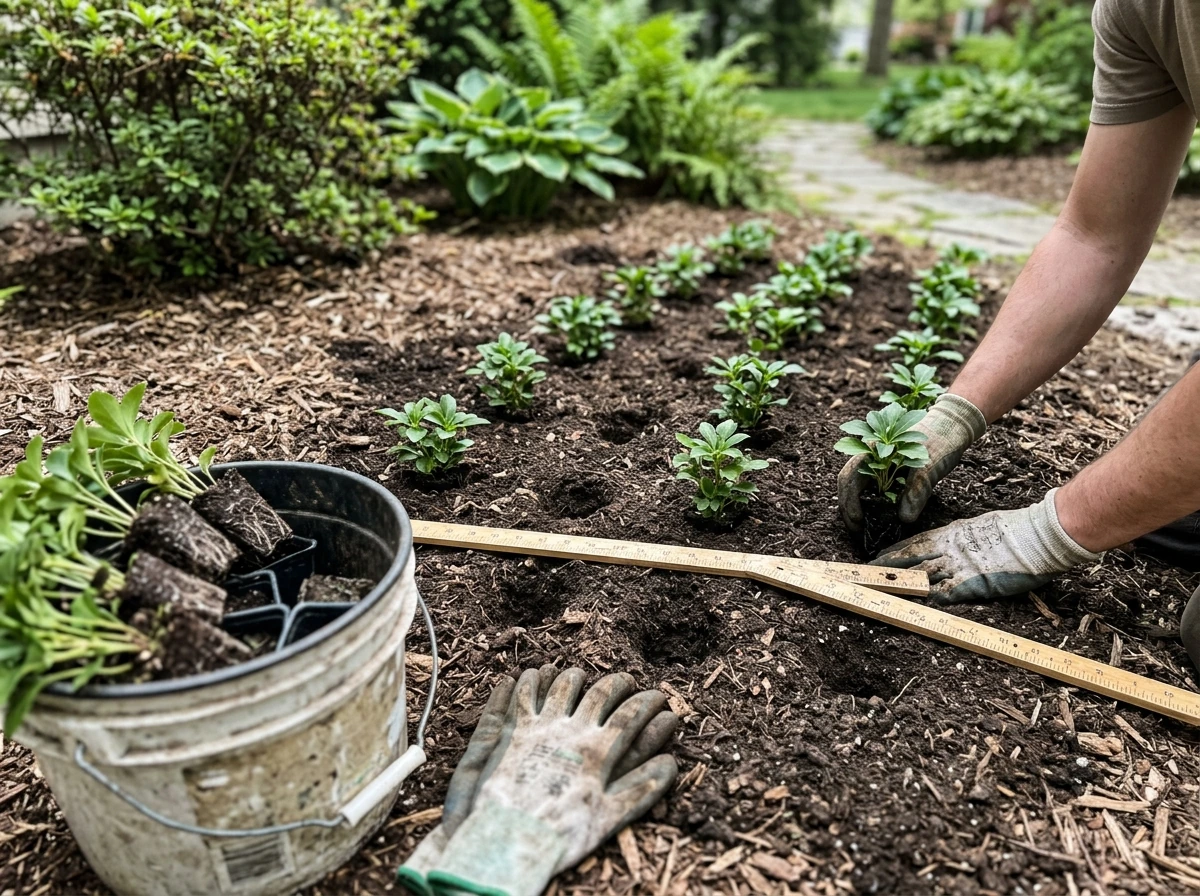
Spacing for Coverage
Plant spacing determines how fast you get coverage. Tighter spacing (6 to 8 inches for small ground covers like pachysandra or thyme) fills in within one to two seasons. Wider spacing (12 to 18 inches) saves money but takes two to three seasons to close the gaps. In the meantime, mulch fills those gaps and suppresses weeds. For large areas on a budget, start with wider spacing and let the plants do the work over two to three years.
Maintenance and Weed Control Without Grass
The honest truth is that grass-free beds are not zero maintenance, especially in the first two years while plants are establishing. But after that, they're typically far less work than a struggling lawn. Here's what to expect and how to stay ahead of weeds.
The First Two Years Are the Critical Window
Water new plantings consistently for the first growing season, especially during dry stretches. Most ground covers need about an inch of water per week until they're established. After that, many (creeping thyme, sedum, liriope, pachysandra) can handle drought with minimal supplemental watering. Don't fertilize heavily in year one. A light application of balanced slow-release fertilizer at planting is plenty. Over-fertilizing pushes leafy growth at the expense of root establishment.
Weed Control Strategies That Actually Work
- Mulch at 2 to 3 inches depth: Your best passive weed suppressor. Refresh it annually as it breaks down.
- Pre-emergent herbicide in early spring: Products containing corn gluten meal (organic) or pendimethalin can prevent weed seeds from germinating. Apply before soil temps hit 55 degrees Fahrenheit. Do not use pre-emergents if you're overseeding or planting seeds.
- Hand-pull weeds while small: A 5-minute weekly pass catches weeds before they set seed. Once they seed, you're fighting them for years.
- Geotextile fabric under mulch: Landscape fabric works well under rock mulch or in high-weed-pressure areas. Avoid it under wood chip mulch in planting beds because it degrades, binds to roots, and makes future soil amendment nearly impossible.
- Spot-treat persistent weeds: A targeted spray of herbicide on individual weeds is more effective and less damaging than blanket applications once your desirable plants are established.
Trimming and Tidying
Most ground covers need occasional shearing or trimming rather than mowing. Vinca and pachysandra benefit from a light shear every couple of years to keep them dense. Liriope can be cut back to about 3 inches in late winter before new growth emerges. Creeping thyme may need trimming after flowering. None of these require the weekly commitment of a lawn.
Step-by-Step Planting Plans: Quick Wins vs. Long-Term Rebuild
How fast you want results changes your approach. Here are two concrete plans: one for getting coverage in a single season, and one for building a low-maintenance planting that holds for decades.
Quick Win: Coverage in One Season
Use this approach if you need results fast and have a modest budget for plants or don't mind spending a bit more upfront.
- Identify your main problem (shade, dry, wet, compaction) using the diagnostic section above.
- Get a soil test if you haven't done one recently. Results in 1 to 2 weeks.
- Clear the area: remove dead grass and weeds. Use cardboard sheet mulching if you have 4 to 6 weeks before planting, or herbicide if you need to plant sooner.
- Aerate compacted areas now if that's your issue. Wait for moist (not wet) soil conditions.
- Amend soil based on test results: compost for sandy or clay soil, lime or sulfur for pH correction.
- Install edging to define the bed and block lawn creep.
- Plant at tight spacing (6 to 8 inches for small ground covers, 12 inches for medium spreaders). Use plugs or potted plants, not seed, for fastest results.
- Mulch immediately with 2 to 3 inches of shredded wood mulch around plants.
- Water deeply every few days for the first 4 to 6 weeks, then weekly unless it rains.
- Pull any weeds that emerge weekly until plants close the gaps, usually by mid-to-late summer if planted in spring.
Long-Term Rebuild: Lower Cost, Better Soil
If you're willing to invest 2 to 3 seasons for a more established result that requires minimal ongoing work, this approach gives you a better foundation and typically costs less upfront.
- Sheet mulch the entire area now: lay cardboard (single layer, overlapping seams by 6 inches) and cover with 4 inches of wood chips or compost. This kills existing vegetation and improves soil over the next 3 to 6 months.
- Get a soil test and note your results. Plan amendments for next planting season.
- In the following spring, cut planting holes through the decomposed cardboard layer and install plants at wider spacing (12 to 18 inches). The decomposed organic matter improves soil quality naturally.
- Apply pre-emergent herbicide around (not on) new plants in early spring of years 2 and 3.
- Refresh mulch annually to maintain 2 to 3 inch depth.
- As plants fill in over seasons 2 and 3, reduce supplemental watering. Most established ground covers become largely self-sufficient.
- Once plants achieve 70 to 80 percent ground coverage, weed pressure drops significantly and maintenance becomes minimal.
Setting Realistic Expectations
Fast-establishing plants like creeping Jenny, vinca minor, and creeping thyme can cover a bed in one full growing season with close spacing. Slower options like pachysandra and wild ginger take two to three seasons. Woody shrubs like creeping juniper take three to five years to reach full spread but then require almost no maintenance. The more patient you can be with the timeline, the lower your upfront plant cost and the more established your planting will be in the long run. Either way, you'll be spending far less time fighting a failing lawn.
If you're looking for inspiration on how to make these planted areas look intentional and polished rather than just functional, it's worth thinking about overall landscape design around problem spots, including landscaping ideas where grass won't grow or shaping the larger yard. But the starting point is always the same: diagnose the real reason grass won't grow, pick a plant that actually fits those conditions, and set it up properly from the beginning. Do those three things and you're already ahead of most people dealing with this problem.
FAQ
How do I figure out whether grass is failing because of shade, drainage, or soil compaction?
Do a simple 2-part check. First, measure direct sun on the bare patch for a full day (aim for morning through late afternoon). Second, after a rain, note how long it stays wet, then do the screwdriver test a day or two later. If it gets less than 3 to 4 hours of sun, shade is probably the main limiter. If water sits for 24 hours or more, drainage is the limiter. If you cannot push the screwdriver more than about 2 inches without force, compaction is the limiter.
Can I use the same ground cover in multiple problem areas, like a shady spot and a dry slope?
Usually no. Most ground covers are happiest in a narrow range of moisture and light. A plant that tolerates shade and dry soil is different from one that tolerates full sun and wetness. If the site has both a shade issue and a moisture issue, prioritize the one that is hardest to change (often light). If you can’t change either, split the bed into zones and plant separately.
What should I do if grass dies in winter but the spot is fine in summer?
That pattern often points to freeze-thaw heaving, salt damage, or drainage freezing and staying saturated. Look for pooling near downspouts or icy runoff, and check whether the area is also near driveways where de-icing salts are used. For these spots, choose plants suited for winter moisture or install a drainage fix before planting, otherwise roots can rot or plants can heave out.
How long do I need to leave weeds dead before planting, especially if I use a herbicide?
If you use a non-selective herbicide, plan on waiting roughly 2 weeks after it is applied to actively growing weeds before planting, then verify the existing plants are fully browned and not regrowing. Also remove loose dead material so seedlings and plugs make good contact with the prepared soil, which improves establishment and reduces weed regrowth.
Is sheet mulching really good enough to stop grass from coming back?
It can work very well when you use enough mulch depth and give it enough time. Use cardboard topped with about 3 to 4 inches of wood chips and let it sit 8 to 12 weeks. Edge the bed so lawn runners cannot creep in from the sides. If you have thick perennial roots, expect some regrowth and plan on spot-removing before planting.
Do I need to aerate even if my soil looks “loose” but grass still fails?
If the screwdriver test shows the soil is easy to penetrate, you may not need core aeration. Aeration matters most when compaction restricts oxygen and water movement. If the issue is shade or drainage extremes, aeration alone will not solve it, and you’ll get better results by fixing drainage or choosing plants matched to the light and moisture conditions.
How much spacing is the right balance between coverage and cost?
Use tighter spacing when you want the bed to look filled sooner and weeds are a concern. For small ground covers, spacing around 6 to 8 inches typically closes gaps in one to two seasons. Wider spacing, about 12 to 18 inches, saves money but usually takes two to three seasons to fully knit together. In the wider-spacing approach, rely on mulch and weed control during the first growing period.
Should I fertilize ground covers the same way I fertilize lawns?
No. Lawns are usually pushed to grow, which is the opposite of what many ground covers need in year one. After planting, skip heavy feeding. A light application at planting, using a balanced slow-release fertilizer, is usually enough. Over-fertilizing can create lush top growth before roots establish, making plants more likely to fail during dry spells.
How often should I water, and what’s the quickest way to tell I’m overwatering or underwatering?
For the first growing season, aim for about an inch per week total, split into appropriate cycles for your soil type and weather. If the bed stays soggy or plants look mushy, watering is too frequent for the drainage you have. If leaves look scorched, growth stalls, or soil dries out faster than you can water, increase frequency or adjust coverage depth and mulch to slow evaporation.
What should I do about edging, do I really need to go 3 to 4 inches deep?
For beds meant to permanently stop lawn encroachment, deeper edging helps because many lawn grasses spread via rhizomes or creeping stems below the surface. Steel or aluminum edging set about 3 to 4 inches down creates a more reliable barrier. Make sure the edging is tight to the mulch line, so lawn can’t sneak in underneath.
Which plants are best for extremely dry shade under large trees?
Under mature trees, the problem is often moisture and root competition, not just light. In those conditions, prioritize shade-tolerant plants that tolerate dry, root-packed soil and accept that some areas may need part hardscape. Even then, expect slower establishment and plan for more careful watering during the first season.
My ground cover fills slowly, can I just top-sow with grass to “stabilize” bare spots?
Avoid that. Adding grass undermines the goal of a grass-free bed and reintroduces your original failure issue. Instead, use mulch to cover bare soil during establishment, and if you need faster closure, tighten spacing or add more plugs in the worst gaps rather than mixing in lawn seed.
Do I need to remove mulch after the first year or can it stay?
In most cases, you can leave mulch in place as a weed and moisture management layer, but refresh it if it breaks down. Keep mulch pulled back from plant crowns or stems so they do not rot. Replenish depth gradually, rather than piling a fresh layer directly on top of saturated, compacted old mulch.
Next Articles
Landscaping Under Trees Where Grass Won’t Grow: A How-To Guide
How to replace failing tree-shade lawns: assess soil and roots, prep with mulch, and install durable groundcovers.
Best Ground Cover for Areas Where Grass Won’t Grow
Pick the best ground cover for tough spots where grass fails, with prep tips, spacing, and fast, low-maintenance options
Landscaping Ideas Where Grass Won’t Grow: Fix Any Spot
Diagnose why grass fails and install weedproof hardscape or groundcovers with soil prep, timing, and spot-by-spot plans.