If grass keeps dying in the same spot no matter what you try, stop blaming yourself. That patch probably has a real, fixable reason why turf won't survive there, and the smartest move is usually to stop fighting it and put something better in its place. This guide walks you through diagnosing the problem, picking a replacement that actually suits your conditions, and installing it so it lasts.
Landscaping Ideas Where Grass Won’t Grow: Fix Any Spot
Marcus Volkmann
24 Mar 2026
Why grass won't grow in certain spots
Most failing turf zones come down to a handful of root causes. Once you know which one you're dealing with, the fix becomes obvious.
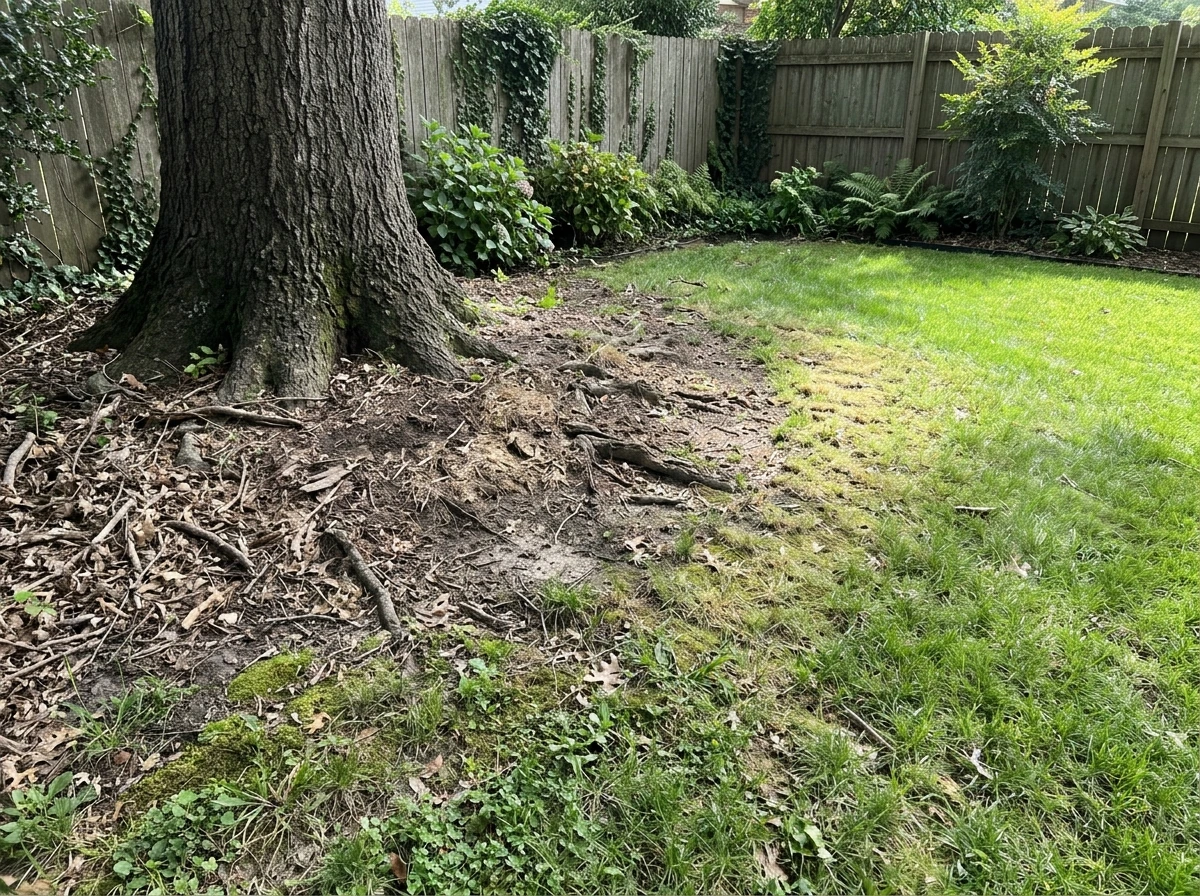
Shade and tree competition
This is the most common culprit by far. Grass under trees doesn't just struggle with low light, it also competes directly with tree roots for water and nutrients. The decline usually happens gradually over several seasons, which is why homeowners often blame weather or pests before realizing it's structural. In heavy shade, there's simply not enough usable light reaching the turf to sustain growth long-term. UGA Extension puts it bluntly: the best solution under a consistent tree canopy is often to stop trying to grow grass there at all.
Compacted soil
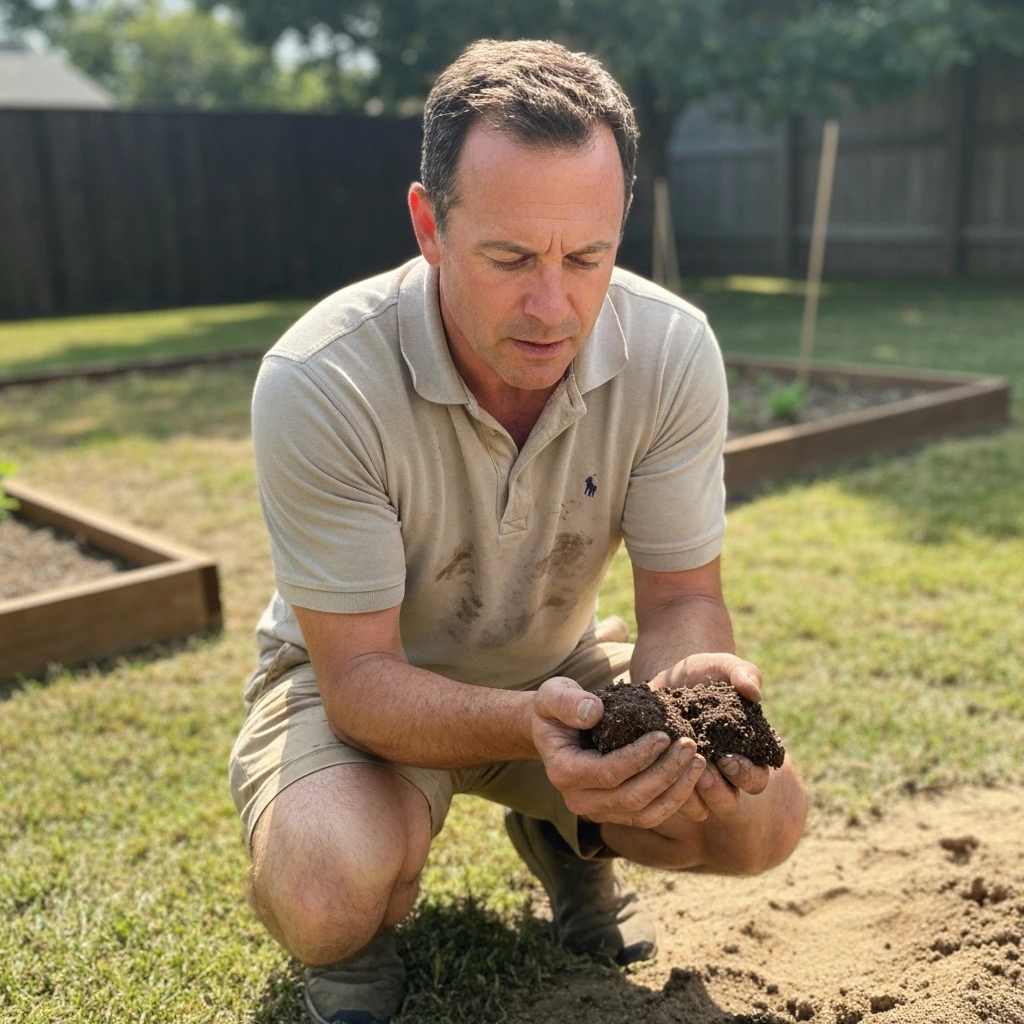
Compacted soil squeezes out the air pockets grass roots depend on. When macropores collapse, water infiltration drops, drainage worsens, and oxygen availability falls, creating conditions where even tolerant grass varieties struggle to establish. High-traffic areas like pathways, driveways edges, and play zones are the usual suspects. You can confirm compaction by pushing a screwdriver into the soil. If it doesn't slide in easily to 6 inches, the soil is too dense.
Sandy or nutrient-poor soil
Sandy substrates drain too fast for most grass to hold moisture between watering cycles. Nutrient-poor soil compounds the problem because grass needs consistent fertility to establish and recover. Dry, sandy patches often look scorched in summer and never fully green up, even with irrigation.
Dog urine damage
Dog urine concentrates nitrogen and salts that injure or kill turf in specific patterns. The classic look is a straw-colored center patch ringed by a band of dark green grass. These spots are often mistaken for turf disease like dollar spot or brown patch, but the pattern is the giveaway. If you have a dog with a favorite bathroom spot, grass is probably never going to thrive there consistently.
Slopes and drainage problems
Steep slopes shed water before grass roots can absorb it. Combined with the difficulty of mowing safely and seeding evenly, slopes are one of the hardest places to establish turf. Areas where water pools or runs off quickly also cause chronic wet-dry stress that weakens grass over time.
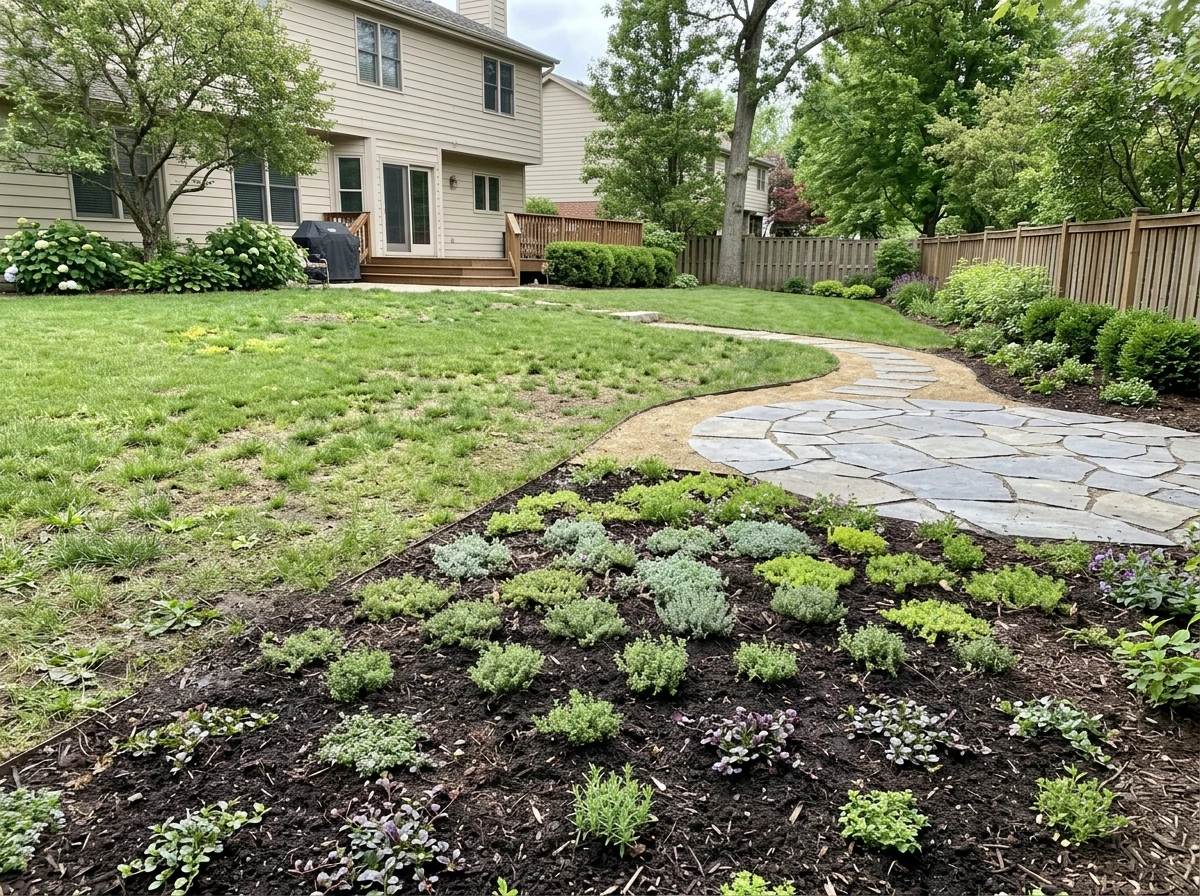
Non-grass landscaping options that actually work
You've got two broad categories to choose from: hardscape (paving, gravel, structures) and living groundcovers (low plants that spread and fill space). Most yards benefit from a combination of both.
Hardscape options
- Decomposed granite or pea gravel: low cost, good drainage, works well in dry or high-traffic zones. Needs edging to stay contained.
- Flagstone or stepping stones: ideal for paths through shade beds or between planting areas. Can be set in sand or gravel for a DIY-friendly install.
- Mulched tree rings: the simplest fix under trees. A 3-to-4-inch layer of wood chip mulch suppresses weeds, retains moisture, and protects tree roots from mower damage.
- Pavers or concrete: best for high-traffic zones and dog runs. Higher upfront cost but zero ongoing maintenance for the surface itself.
- Raised beds: useful in areas with severely poor or compacted soil where building up is easier than fixing what's there.
Living groundcovers and native plants
Living groundcovers give you the green, natural look of a lawn without the maintenance demands or the failure points of turf. Native plants are especially reliable because they're adapted to your region's soil and rainfall patterns. In shade zones specifically, groundcovers can outcompete many weeds once established and generally need less care than grass ever did in that spot.
- Ajuga (bugleweed): spreads into a dense mat 2 to 8 inches tall, handles shade well, and produces purple flower spikes in spring.
- Vinca (periwinkle): a reliable shade performer with glossy leaves and blue flowers. Spreads quickly, which is a feature in problem areas.
- Mondo grass (Ophiopogon japonicus): evergreen, grass-like appearance, 4 to 12 inches tall, works in sun or shade, and prefers moderately moist soil.
- Native ferns: excellent for deep shade under established trees where almost nothing else will grow.
- Creeping thyme: sun-loving, drought-tolerant, handles light foot traffic, and smells great when brushed.
- Sedums and succulents: ideal for dry, sandy, or rocky zones with full sun.
- Native wildflower mixes: good for slopes and naturalized areas where you want low-input color.
The best low-maintenance groundcovers compared
If you're trying to narrow down which groundcover fits your specific problem spot, this comparison covers the conditions that matter most.
| Plant | Light | Water needs | Height | Traffic tolerance | Best for |
|---|---|---|---|---|---|
| Ajuga (bugleweed) | Part to full shade | Low to moderate | 2–8 in | Low | Shaded beds under trees |
| Vinca (periwinkle) | Part to full shade | Low to moderate | 6–18 in | Low | Large shaded areas, slopes |
| Mondo grass | Sun or shade | Moderate | 4–12 in | Low to moderate | Borders, shade, transition zones |
| Creeping thyme | Full sun | Low | 2–4 in | Moderate | Dry zones, path edges, sunny slopes |
| Sedum (stonecrop) | Full sun | Very low | 2–6 in | Low | Sandy, rocky, or dry spots |
| Native ferns | Full to deep shade | Moderate to high | 12–36 in | None | Deep shade under canopy trees |
| Creeping Jenny | Part shade | Moderate | 2–4 in | Low | Moist areas, pond edges, dappled shade |
My go-to recommendation for most shaded yards: start with Ajuga or Vinca. They're forgiving, spread reliably, and are widely available. For sunny, dry zones, creeping thyme wins on every count. If you want something that looks like grass without being grass, Mondo grass is the closest match and handles a wider range of light conditions than any true turf variety.
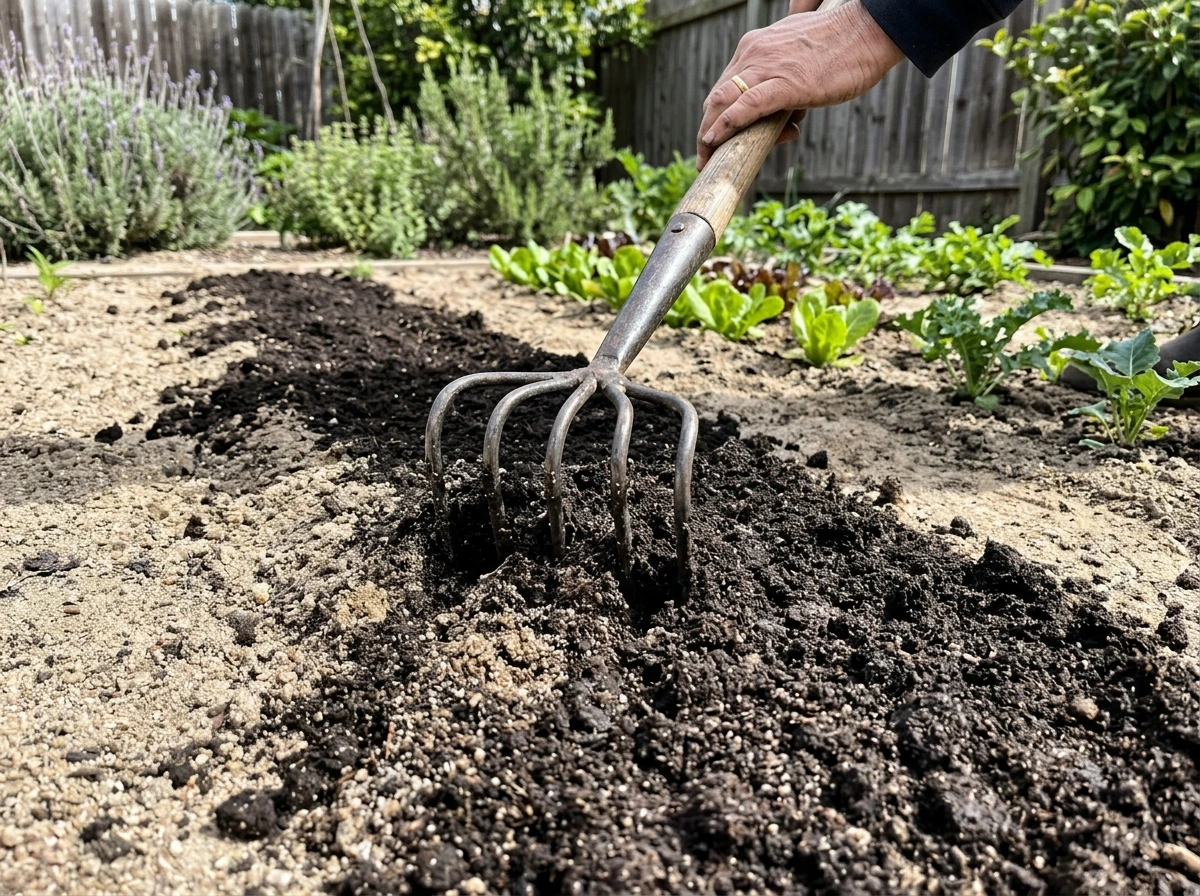
Soil prep so your replacement actually thrives
Here's where most people skip a step and then wonder why their groundcover looks rough after year one. Getting the soil right before you plant makes the difference between a replacement that fills in within one season and one that limps along for years.
For compacted soil
Aerate first. Core aeration (pulling 3-inch plugs) creates immediate macropore space. Follow with a 1-to-2-inch layer of compost worked into the top few inches. For groundcovers in compacted areas, you don't need perfect soil throughout, just enough loose material in the top 4 to 6 inches for roots to establish. If the area gets foot traffic, choose groundcovers rated for it (creeping thyme, for example) or redirect traffic with stepping stones and let the plant fill around them.
For sandy or nutrient-poor soil
Add organic matter aggressively. Sandy soil needs 3 to 4 inches of compost tilled into the top 8 inches to meaningfully improve water retention. For groundcovers and native plants, matching the plant to the soil type is often smarter than amending extensively. Sedums and drought-tolerant natives genuinely prefer lean, fast-draining sandy soil. Fighting the soil's nature is usually more work than choosing plants that belong there.
For shaded areas under trees
Avoid deep digging near tree roots. Instead of tilling, work compost gently into the top 2 to 3 inches or simply top-dress with it before planting. Tree roots are often shallow and widespread, and aggressive soil disturbance harms both the tree and your new plants. Adding a 2-inch compost layer after planting functions as both a soil amendment and a mulch layer.
Soil pH and fertility basics
Run a basic soil test before you spend money on plants. Your local cooperative extension office typically offers them for $15 to $25. Most groundcovers tolerate a pH of 5.5 to 7.0, but knowing where you're starting helps you avoid planting acid-lovers in alkaline soil or vice versa. Extension offices can also recommend region-specific amendments based on your results.
Planning your solution by yard area
Different problem zones need different approaches. Here's how to think through each one.
Under trees and shaded beds
The single best thing you can do under a tree is expand the mulched ring and plant shade-tolerant groundcovers at its edge. This eliminates mower damage to the tree base, removes root competition from grass, and gives you a planting zone that works with the tree's natural conditions instead of against them. Ajuga, Vinca, Mondo grass, and native ferns are all proven performers here. Space plants according to their mature spread, usually 12 to 18 inches apart for most groundcovers, and let them fill in. Ajuga, Vinca, Mondo grass, and native ferns are all proven performers here. Space plants according to their mature spread, usually 12 to 18 inches apart for most groundcovers, and let them fill in. You can find deeper guidance on this approach in our article on landscaping under trees where grass won't grow.
Slopes
Slopes need plants with deep or spreading root systems that anchor soil and tolerate irregular moisture. Vinca, native grasses, ornamental grasses, and low-growing natives all work well. For steeper slopes (more than a 3:1 ratio), consider biodegradable erosion control fabric laid over planted plugs while roots establish. Avoid loose mulch on steep slopes because it washes downhill. Ground-level rock or gravel mulch holds better.
High-traffic areas
If people are walking through an area, hardscape is your most durable answer. Stepping stones, decomposed granite paths, or pavers give foot traffic somewhere to go while you plant low-growing groundcovers in the remaining spaces. Creeping thyme between pavers is a classic combination. It handles moderate traffic, spreads slowly to fill gaps, and requires no mowing.
Dry and sandy zones
Match the plant to the reality. Sedums, creeping thyme, native wildflowers, and ornamental grasses like blue fescue and buffalo grass relatives are built for exactly these conditions. Gravel mulch retains heat and reflects light in a way that suits Mediterranean-climate and drought-adapted plants. A 2-to-3-inch gravel layer also suppresses weeds effectively in open sunny areas.
Dog damage zones
If a dog has a predictable bathroom spot, redirect them with physical barriers or a designated gravel or mulch area. Irrigating the area immediately after a dog visit can dilute urine nitrogen and reduce spot damage, but it's a maintenance commitment. The more permanent fix is converting the zone to mulch with a few robust plants that aren't as sensitive to nitrogen loading, or simply installing a gravel pad or flagstone area there.
How to install your replacement: step by step
This process works whether you're converting a shaded bed, a dry patch, or a full lawn area. Adjust the steps to your specific conditions.
- Mark the area clearly. Use spray paint or a garden hose to define the edges of the zone you're converting. A defined edge looks intentional and makes installation easier.
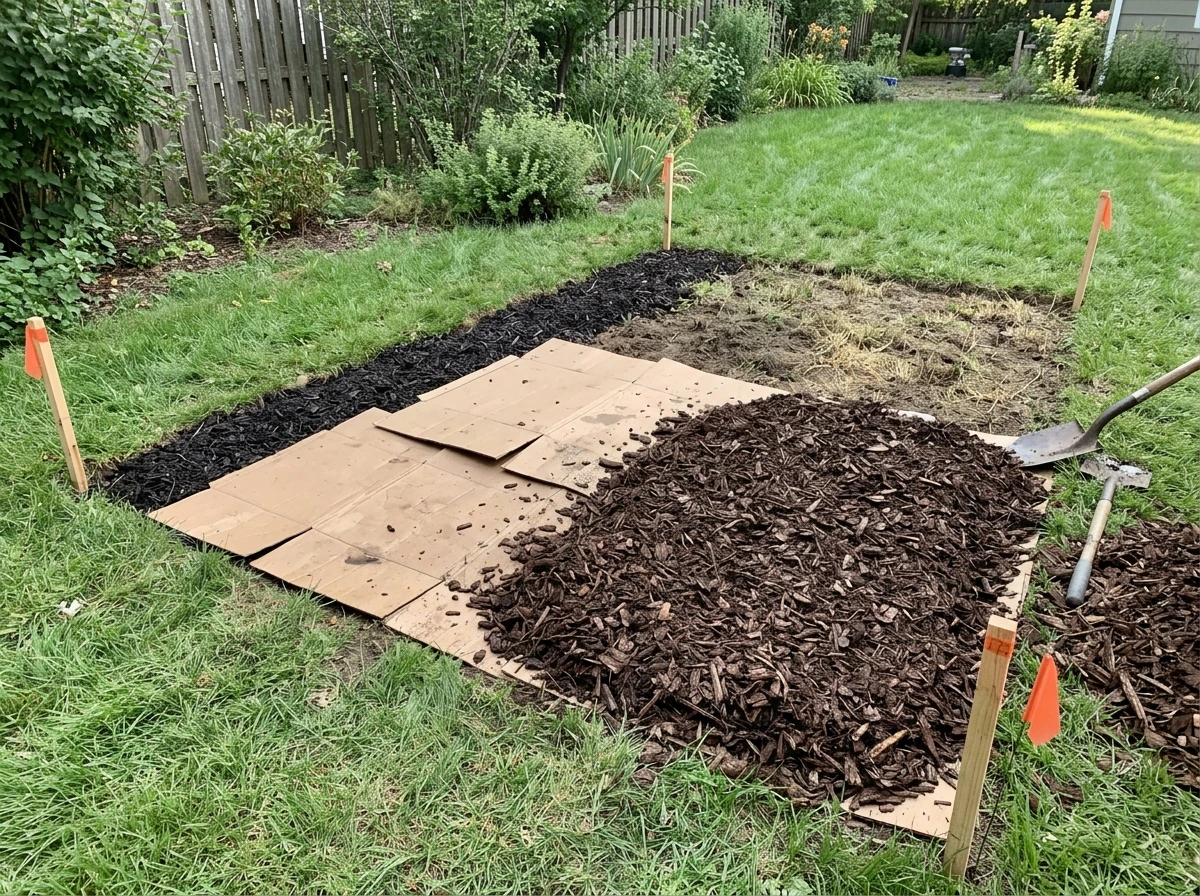
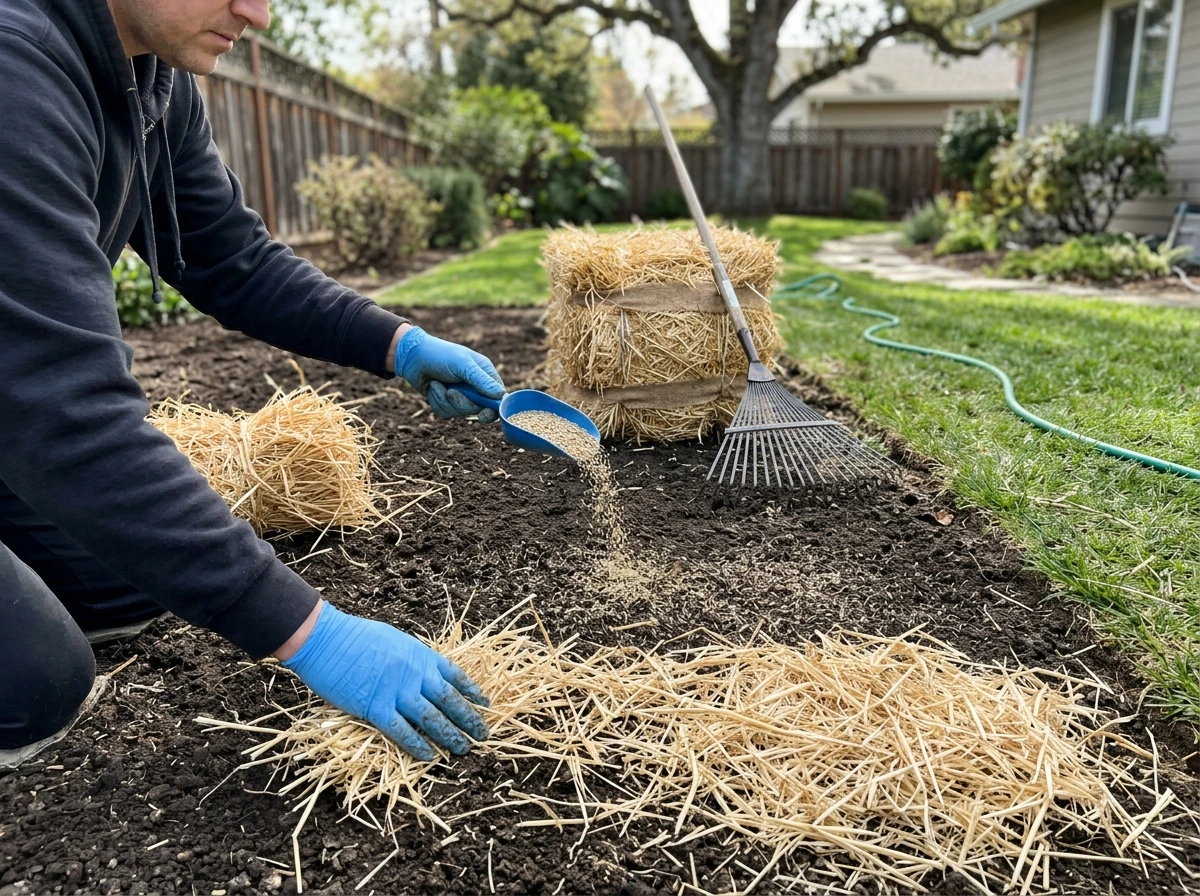
- Kill or remove existing vegetation. For live grass or weeds, you have three main options: manual removal, solarization, or sheet mulching. For small areas, hand-digging works. For larger zones in summer, solarization with clear plastic sheeting takes 2 to 6 weeks depending on your climate and can kill annual weeds and some pathogens. Sheet mulching with cardboard works year-round.
- Sheet mulch if you're going the cardboard route. Use plain brown corrugated cardboard only, no shiny or printed surfaces, and remove all tape and staples first. Lay it directly over the cleared area with edges overlapping by 6 to 8 inches to prevent weeds from sneaking through gaps. Wet the cardboard thoroughly.
- Add compost. Layer 2 to 3 inches of compost directly over the cardboard. This becomes the planting medium for groundcovers and feeds the soil as the cardboard breaks down.
- Install plants or hardscape. For groundcovers, cut through the cardboard and compost layer to plant directly into the soil below. For hardscape, the cardboard layer can stay in place beneath gravel or mulch.
- Mulch around new plants. A 2-to-3-inch layer of wood chip mulch around (not touching) plant stems retains moisture, moderates soil temperature, and suppresses weeds while your groundcover fills in.
- Edge the zone. Install steel, aluminum, or composite edging to keep mulch and groundcover contained and prevent grass from migrating back in from surrounding areas.
- Water in new plants. Most groundcovers need consistent moisture for the first 4 to 6 weeks while roots establish. After that, water needs drop significantly for most varieties.
Weed control during the conversion period
Weed pressure is highest between installation and when your groundcover fills in enough to shade the soil. Sheet mulching with cardboard reduces germination significantly during this window, but it's not a permanent solution on its own. The goal is to get your groundcover plants dense enough to crowd weeds out naturally. Clear established perennial weeds before you lay cardboard because most groundcovers can't compete against mature tap-rooted weeds that push through barriers. Hand-pull any weeds that appear through mulch in the first season before they root deeply.
Landscape fabric is a common alternative to cardboard, but it's worth being realistic about it. Fabric slows weed germination well initially, but once organic matter accumulates on top of it, weeds root into that layer and become just as hard to manage as they would be without any barrier. Organic sheet mulching tends to perform better long-term because it breaks down into the soil and supports plant and microbial health rather than degrading into a weed trap.
Maintenance, costs, and 'will this actually work here?' checks
Realistic maintenance expectations
Most established groundcovers need significantly less care than turf. No mowing, reduced watering after year one, and minimal fertilizing. The trade-off is the establishment period: the first full growing season usually requires hand-weeding, supplemental watering, and some plant replacement if you get gaps. By year two, a well-chosen groundcover in the right conditions is largely self-managing. Hardscape is even lower maintenance once installed, though gravel zones benefit from occasional raking and edge touch-ups.
Budgeting your conversion
Costs vary widely depending on the size of the area and what you choose, but here are realistic ballparks for a typical 200-square-foot problem zone.
| Approach | Estimated material cost | DIY difficulty | Lifespan |
|---|---|---|---|
| Wood chip mulch only | $50–$150 | Easy | Replenish every 2–3 years |
| Sheet mulch + groundcover plugs | $150–$400 | Moderate | Permanent once established |
| Decomposed granite/gravel | $200–$500 | Moderate | 10+ years with edging |
| Flagstone or stepping stones | $300–$700 | Moderate to hard | Decades |
| Pavers or concrete | $600–$2,000+ | Hard (often hire out) | Decades |
| Native plant bed with mulch | $200–$600 | Moderate | Permanent, self-sustaining over time |
How to verify your plan will work before you spend money
Run through this checklist before buying plants or materials. It takes about 15 minutes and can save you a full season of frustration.
- Measure light accurately. Spend one day noting how many hours of direct sun the problem area gets. Less than 2 hours is deep shade, 2 to 4 hours is part shade, more than 6 hours is full sun. Match your plant choice to this number, not to what you wish it was.
- Check drainage. Dig a 12-inch hole, fill it with water, and time how long it takes to drain. If it takes more than 4 hours, you have a drainage problem that needs addressing before planting.
- Identify the cause. Use the causes section above to name the actual reason grass failed. Shade, compaction, drainage, dog damage, and sandy soil each have different solutions. Treating the wrong cause wastes money.
- Cross-check your plant choice with your local extension service. State extension websites (search your state name plus 'cooperative extension groundcovers') have regionally specific plant lists that account for your climate, pest pressure, and soil types. A plant that works in Georgia may perform poorly in Colorado.
- Start small if you're unsure. Convert a 50-square-foot test section first. Give it one full growing season and evaluate before converting the rest of the yard.
Long-term success factors
The biggest long-term risk with any groundcover conversion is edge creep, where surrounding grass or weeds migrate into your new planting zone. Good physical edging and annual edge maintenance are the simplest prevention. For shade plantings, revisit the area every few years as trees grow and shade patterns shift. A plant that thrived in part shade can struggle if the canopy closes in further. Being willing to swap plants over time is part of managing a living landscape rather than fighting it.
If you're also evaluating specific plants to fill those non-grass zones, our articles on ground cover for areas where grass won't grow and [what to plant where grass won't grow](/grass-over-hard-surfaces/what-to-plant-where-grass-won-t-grow) go deeper on plant selection by region and condition. The framework here gives you the foundation, and those resources help you narrow to exactly the right plant for your specific spot.
FAQ
Can I just re-seed the failing grass instead of switching to groundcovers or hardscape?
Yes, but only if the goal is to correct the real limitation. If the issue is constant deep shade, dog urine, persistent compaction, or chronic wet-dry stress, restarting turf usually means repeating the same failure. In those cases, choose a groundcover or hardscape plan instead of another seeding cycle.
How many plants do I need, and what spacing prevents gaps and weed takeover?
For groundcovers, you want fewer, larger plants with proper spacing based on mature width, then top-fill any gaps. If you buy very small plugs and space too widely, weed pressure and slow fill-in are likely, so plan either closer spacing or be ready for gap replanting during year one.
What should I do if my groundcover looks rough after planting?
You can prune or cut groundcovers to clean up year-one messiness, but avoid aggressive scalp cuts. A safer approach is to shear lightly after flowering or when the canopy is established, so the plants keep enough leaf surface to recover and quickly close over bare soil.
Do I need fertilizer to make groundcovers spread faster?
Routine fertilizing is usually unnecessary and can backfire in problem spots, especially sandy areas and under trees where roots compete. Instead, rely on compost for soil improvement, and only add fertilizer if your soil test shows a specific deficiency.
How thick should mulch or compost be under trees, and should it touch the trunk?
Yes. Under trees, avoid piling mulch against the trunk or burying surface roots. Keep compost or mulch as a 1 to 2 inch layer with a small buffer from the trunk base so air and moisture conditions stay healthy for both tree roots and new plants.
Will cardboard or landscaping fabric work on slopes, or are there better options?
For steep slopes, limit loose mulch and use erosion control that is compatible with planting. Biodegradable fabric over plugs can help during establishment, but once plants root, you should reduce reliance on fabric so it does not interfere with future root growth and weed management.
Why did weeds grow through my sheet-mulch or landscape fabric?
If you see weeds through cardboard or fabric, it often means mature weeds were already established or the barrier got clogged with organic debris. The fix is not just adding more barrier, it is removing established weeds first and then using dense, correctly spaced planting so sunlight reaches the soil less and fewer seeds can germinate.
How should I water during the first season so the new plants establish without wasting water?
Most groundcovers should be watered deeply at first, then transitioned to less frequent watering as roots establish. Use a simple test: water until the top few inches are moist, then wait until that layer starts to dry before watering again, because consistently wet soil slows root formation and invites disease.
What’s the best way to prevent grass from creeping into the new groundcover zone?
Edge creep is the most common long-term issue, so plan for a defined border from day one. Use edging that cuts at least a few inches down and commit to yearly trimming or a seasonal pass with a spade to prevent grass or weeds from invading the groundcover area.
Which groundcovers handle foot traffic best, and when should I add stepping stones instead?
If you have foot traffic, choose a plant that tolerates rubbing and occasional stepping, and guide traffic toward stepping stones or pavers. Creeping thyme and some ornamental groundcovers handle light traffic, but for frequent walking you will get better longevity by mixing pathways with planting gaps.
Is a soil test worth it if the spot looks clearly “bad” already?
A soil test helps, but it is not the only decision tool. Match plant selection to the limiting factor first, like shade depth, drainage speed, or nitrogen exposure, then use pH results to fine-tune amendments so you are not solving the wrong problem.
What’s the most durable way to handle a repeated dog bathroom spot?
If dog urine patterns are predictable, convert the spot to materials and plants that tolerate nitrogen and salts better, or create a designated gravel or flagstone area. Also, avoid relying on repeated quick flushes long-term because it becomes a maintenance schedule and salts can still accumulate in soil.
Next Articles
Does Hay Help Grass Grow? How and When to Use It
Yes, hay can help grass grow by protecting seed and keeping moisture, but only with proper timing, thickness, and condit
Does Epsom Salt Help Grass Grow? Bermuda Guide, Timing
Yes, sometimes for Bermuda if magnesium is low. Get timing, realistic results, safe application, and faster fixes if not
Will Sand Help Grass Grow? When It Works and How to Apply It
When sand helps or hurts lawns, how it improves drainage and soil structure, plus rates, steps, and troubleshooting.